The QuickBooks accounting software can be used both in a single-user and multi-user mode. This allows small and medium-sized business owners to authorize their employees/staff to carry out tasks efficiently. It’s not difficult to switch between single and multi-user modes in QuickBooks, whenever you feel the need of doing so. Quickbooks multi-user mode can be used for various purposes, to know more you can approach our Quickbooks helpline number.
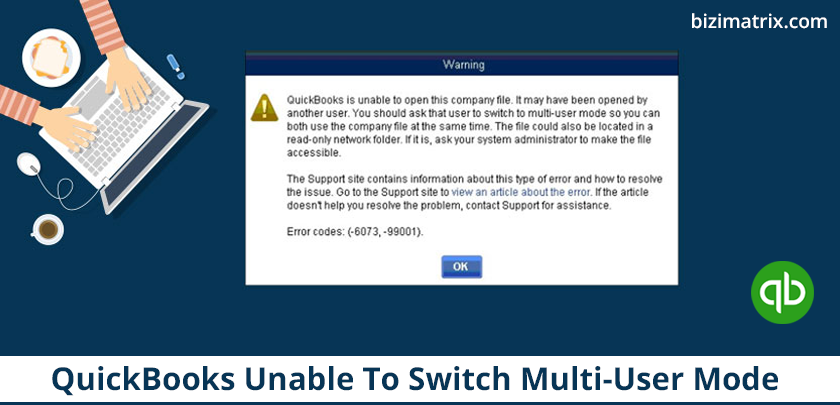
However, if you experience problems and receive an error message such as QuickBooks is unable to switch to multi-user mode, then the solution to resolve this issue or error is provided in this article. Let’s go ahead and learn the possible causes of the error: QuickBooks unable to switch to multi-user mode and find solutions to fix the error in an effective manner.
What Causes QuickBooks Unable To Switch To Multi-User Mode Error?
QuickBooks H202 error is a common error that occurs in QuickBooks. Also, in this type of error, the error message is either not displayed on the host computer, or it is passed on to the server of the other system. The reason behind the H202 error is that when you are trying to work with a company file that is located on another computer and your QuickBooks cannot reach the server of that computer.
The various reasons that may be responsible for the QuickBooks unable to switch to multi-user mode error to occur on your computer are mentioned below:
- QuickBooks cannot find the IP address of the system
- Incorrect hosting settings
- The antivirus program has denied access to the system where the company file is saved
- A firewall is blocking the two-way communication
Thus, if you encounter an error such as QuickBooks unable to switch to multi-user mode, then you may need to consider the possible reasons that are given above.
The solution to fix QuickBooks unable to switch to multi-user mode error is provided in the next section.
How To Fix QuickBooks Unable To Switch To Multi-User Mode Error
Before you go about resolving the error that occurred in your QuickBooks accounting software, you are required to make note of certain things:
(i) If you do not already have QuickBooks Database Server Manager installed on your computer, then install it first.
(ii) The version of QuickBooks Database Server Manager must be of the same version as that of your QuickBooks installed on your computer.
Step 1: Enable the hosting of local files
In order to fix QuickBooks unable to switch to multi-user mode error, it is required that you allow hosting to local files. Follow the steps given below to enable the hosting of local files.
- Open QuickBooks, then press the F2 key on your keyboard. This will display the Product Information window for QuickBooks on your screen.
- You should also see the local server information and Hosting must be set to local files only.
Note: If Hosting is not set to local files, then you must set it to enable local files from QuickBooks preferences.
Step 2: Restart QuickBooks Database Server Manager
After having set Hosting to local files, it is required that you restart QuickBooks Database Server Manager for the changes to take effect.
- Click the Windows Start button and select Run on the Start menu.
Note: Alternatively, you can press Windows + R to bring up the Run box.
- Type “services.msc” (without quotes) in the Run box and click the OK button or press Enter.
- In the Services window, locate and select QuickBooks Database Server Manager on the list, then click Restart from the left pane/sidebar.
Note: Alternatively, you can right-click and select Restart from the menu.
- Close the Services window.
Step 3: Delete the.ND file.
By default, Windows does not display file extensions/formats. Follow the steps given below to allow displaying file extensions in order to locate and delete the.ND file from the QuickBooks directory.
- On Windows 7, press the Win key, type “folder options” (without quotes) in the search box, and press Enter.
- In the Folder Options window, go to the View tab and uncheck Hide extensions for known file types. Also, check Show hidden files and folders.
- Click the Apply or OK button.
Note: On Windows 8 and 10, open Windows/File Explorer, click the View ribbon and check File name extensions.
- Now, open Windows/File Explorer, then in the top search box, type.ND to display the appropriate file from your QuickBooks directory.
- If found, select, and delete the.ND file.
Step 4: Recreate the.ND file
After deleting the.ND file from your computer, you will need to create a new.ND file. The steps are given as under:
- Click Start, go to All Programs, then QuickBooks, and click to open QuickBooks Database Server Manager.
- Select the Scan folder, then click the Add folder button and select Browse the company folder.
- Select your company file, then click the OK button.
- Now, click Scan, then close when the scan is completed successfully.
Step 5: Turn off Hosting
Here, you need to make sure that the client system(s) is not trying to host the company file. Thus, hosting must be turned off. If Hosting is not turned off, then switch hosting modes from the steps given below:
- Login to your QuickBooks as an administrator.
- Go to Menu → Utilities → Stop Hosting Multi-User Access.
- Click Yes at the prompt, then close QuickBooks.
- Now, re-open QuickBooks and press the F2 key on your keyboard to bring up the Product Information window.
Verify the details shown in the Product Information window, then check if you are able to switch to multi-user mode in QuickBooks. Few features like QuickBooks terminal server multi-user mode & QuickBooks multi-user mode grayed out can be checked easily, by dialing our support number QBs.
Conclusion
QuickBooks accounting software is usually set up to be used by small business owners for multi-user mode. However, sometimes when you decide to switch to multi-user mode, you are often greeted with the H2H2 error. And there is much such error that prevents using multi-user mode in QuickBooks online. We have listed all possible solutions to fix these types of errors.
Read More…